
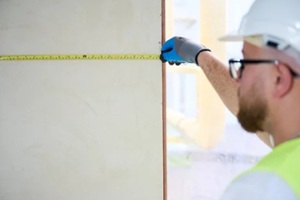
 Custom wall panels leave little room for measurement error. Seams, pattern registration, and substrate cuts are locked in before a panel reaches the wall, so a figure off by half an inch can force a costly reorder.
This guide covers how to measure wall panels for a commercial project, account for obstacles such as doors and outlets, calculate square footage, and add the buffer a fabricator needs for accurate wall panel installation measurements.
Key Takeaways
|
Why Panel Measurements Demand More Precision Than Wallpaper or Paint
Paint absorbs a small measurement error easily, and a wallpaper strip can be trimmed on site with a utility knife. Custom wall panels offer no such flexibility once material leaves the print bed. Each panel arrives pre-cut to a specific width and height, with seams, pattern repeats, and print registration set before installation day.
That rigidity changes how measuring for wall coverings works at the commercial level. Fabricators treat every custom wall covering measurement as a fabrication input, not an estimate. A wall recorded at 118 inches instead of 120 does more than leave a 2-inch gap. It shifts where every later seam lands and throws off a pattern meant to read as one continuous image.
How to Measure Wall Panels Before Submitting an Order
Measure width along the base of each wall, corner to corner, and not along trim or baseboard. Trim sits proud of the actual wall plane and overstates usable width by a quarter inch or more per side, an error that compounds quickly across a multi-panel run.
Height needs more than one reading. Take a floor-to-ceiling measurement at the left edge, center, and right edge of each wall section, because commercial ceilings often carry enough build tolerance to leave one end taller than the other. Use the tallest number, since a fabricator can trim excess material on site but cannot add height to a panel that arrived short.
A laser measure speeds up measuring a wall for installation on tall commercial spans and cuts the sag error a fabric tape introduces over long distances. A standard tape works fine under roughly 12 feet. Recording clean, repeatable figures at this stage is what keeps a custom wall covering order from stalling in review.
Accounting for Doors, Windows, and Other Wall Obstacles
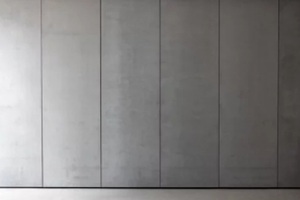 Record each obstacle’s width and height, then its distance from the nearest wall corner and from the floor. Every interruption in the wall needs that full set of coordinates, not a general note that it exists. That distance, not just the obstacle’s size, tells a fabricator where a seam or cutout has to fall.
The stakes climb when a design calls for a continuous image or pattern across multiple panels. A wayfinding graphic or branded mural loses its effect if a doorway cutout lands mid-logo because the opening was estimated instead of measured. Share these coordinates during the design process so panel breaks can be adjusted before cutting rather than after.
Calculating Wall Panel Square Footage and Building in an Installation Buffer
A fabricator calculates square footage by multiplying width by height for each wall section, subtracting the area of any obstacle you don’t want covered, and adding the section totals together. A single doorway barely complicates the math, but six wall segments with varied door and window placements call for a spreadsheet rather than mental arithmetic.
Residential instructions for measuring for wallpaper walk through the same basic width, height, and obstacle steps. They rarely address what commercial wall panel ordering requires beyond that, including overage for pattern matching across multiple panels and allowances for site conditions like uneven slabs or out-of-plumb corners.
Fabricators build in extra material to cover cutting tolerance, pattern alignment, and on-site adjustment. How much depends on three factors: substrate rigidity, seam pattern, and site access.
Substrate rigidity sets how much a panel can be trimmed on site without compromising its edge. A flexible film accepts more field trimming than a rigid acrylic panel, which must be cut close to final dimensions before it leaves the shop.
The seam pattern sets how much repeat material a continuous image or branded graphic needs to stay aligned from one panel to the next. A design that must match at the seam consumes more material than a solid color or an abstract texture.
Site access sets how much room an installer has to adjust panels in place. Tight ceiling clearance or an obstructed corner leaves little room to correct a marginal measurement error, which is why fabricators ask about clearance before finalizing an order.
How Substrate and Hanging Systems Change What You Measure
The measurements a fabricator needs also depend on how the panel will be hung. A rail-based hanging system such as EZ Rod or Structure Lite requires ceiling-to-floor clearance at the mounting point, not just overall wall height, because the rail hardware itself takes up vertical space above and below the panel.
A wire-suspended setup like EZ Wire shifts the priority again, since the panel hangs from a ceiling anchor point rather than resting against the wall at a fixed height. Confirm which system a project will use before you measure, so a second site visit is not needed to capture hardware clearance missed the first time.
Common Measurement Mistakes That Turn Into Reorders
A wall recorded from outside the baseboard, a height taken at only one point, or a doorway logged as centered when it sits 18 inches off all raise the odds of a reorder more than any single material choice.
A documented process prevents mistakes by labeling each wall, sketching obstacle locations, recording height at multiple points, and double-checking every figure before submitting. Projects built on a clear wall panel sizing guide, especially those using digital wall covering measurement for continuous imagery or branded patterns, gain the most from this discipline, since one missed number can force a full reprint instead of a small field adjustment.
Choose Precisely Measured Custom Wall Panels for Your Commercial Space
 Tree Towns Digital Decor works directly with architects, designers, and facilities teams to confirm every measurement before a custom wall panel goes into production, catching obstacles, hanging system requirements, and buffer needs during design rather than after fabrication begins. Most custom panel orders move from confirmed measurements to installation in two to three weeks.
Contact Tree Towns to review your wall dimensions with our team, or get a custom quote to start your project with accurate specifications from the first measurement.